
❓ How To Set Up a Dedicated Node
1. Sign Up & Sign In
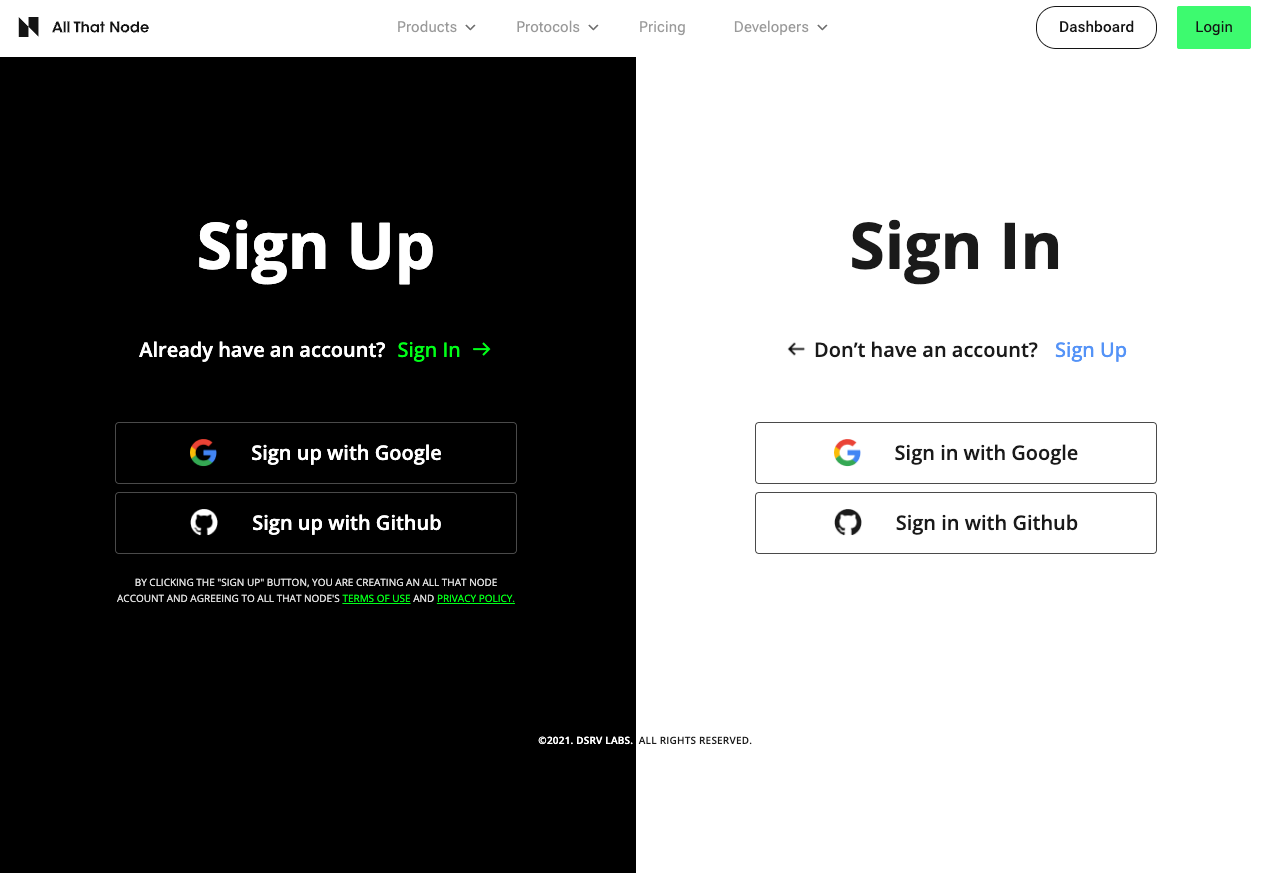
Create a free new account and sign in to the All That Node. Currently, only SSO with Google is supported (including Google organization accounts) for the sign-up option.
Note that to start using our service you must accept our Terms of Service and Privacy Policy.
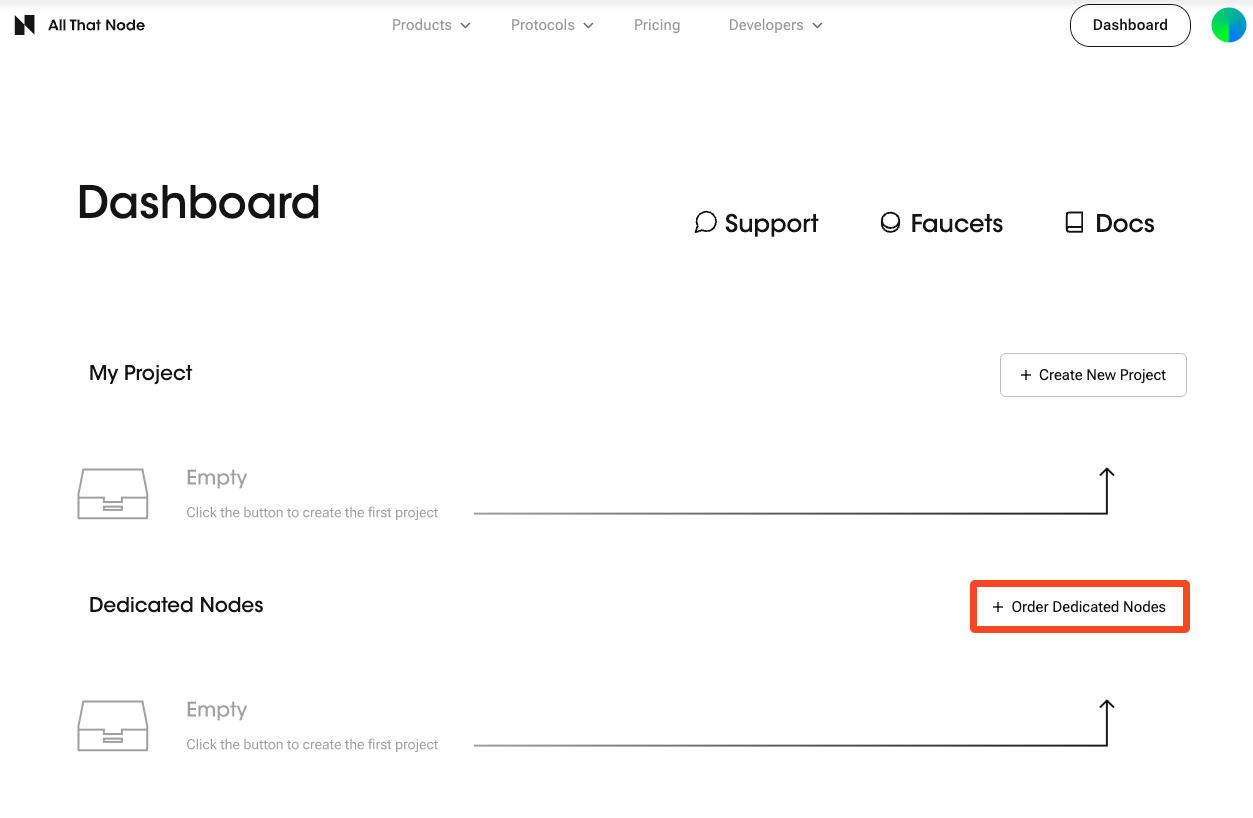
2. Create a Dedicated Project
- Click "Create New Project" button on the user dashboard.
- Select "Dedicated" as your node type.
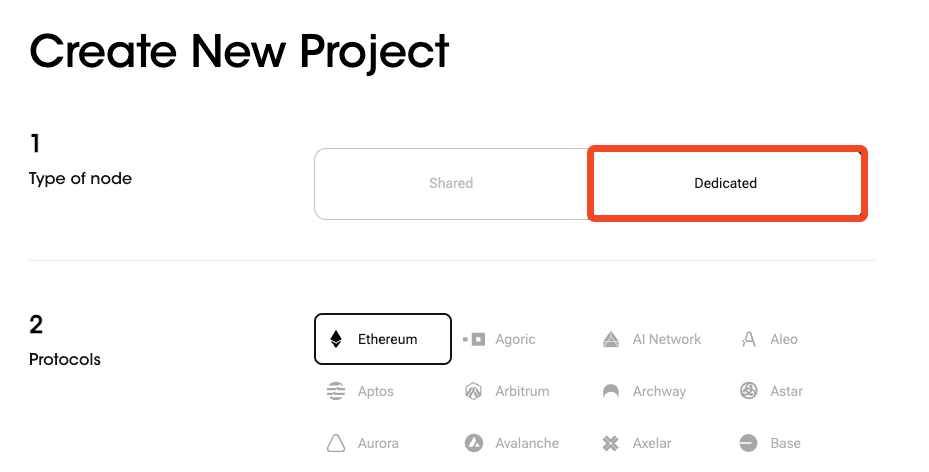
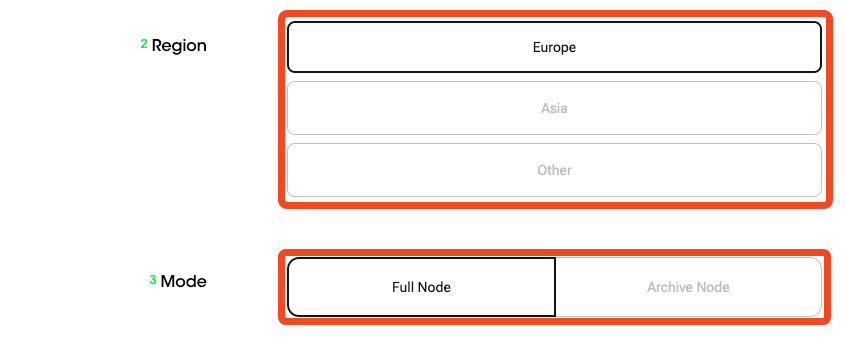
- Choose the protocol, network, region and mode.
If the protocol you're looking for isn't on the list, you can select the "Other" button and enter the desired protocol.

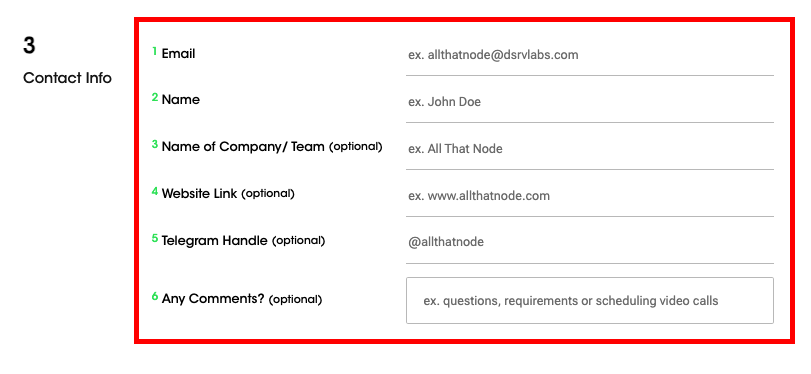
- Enter your contact info. We will send the payment link to your email.
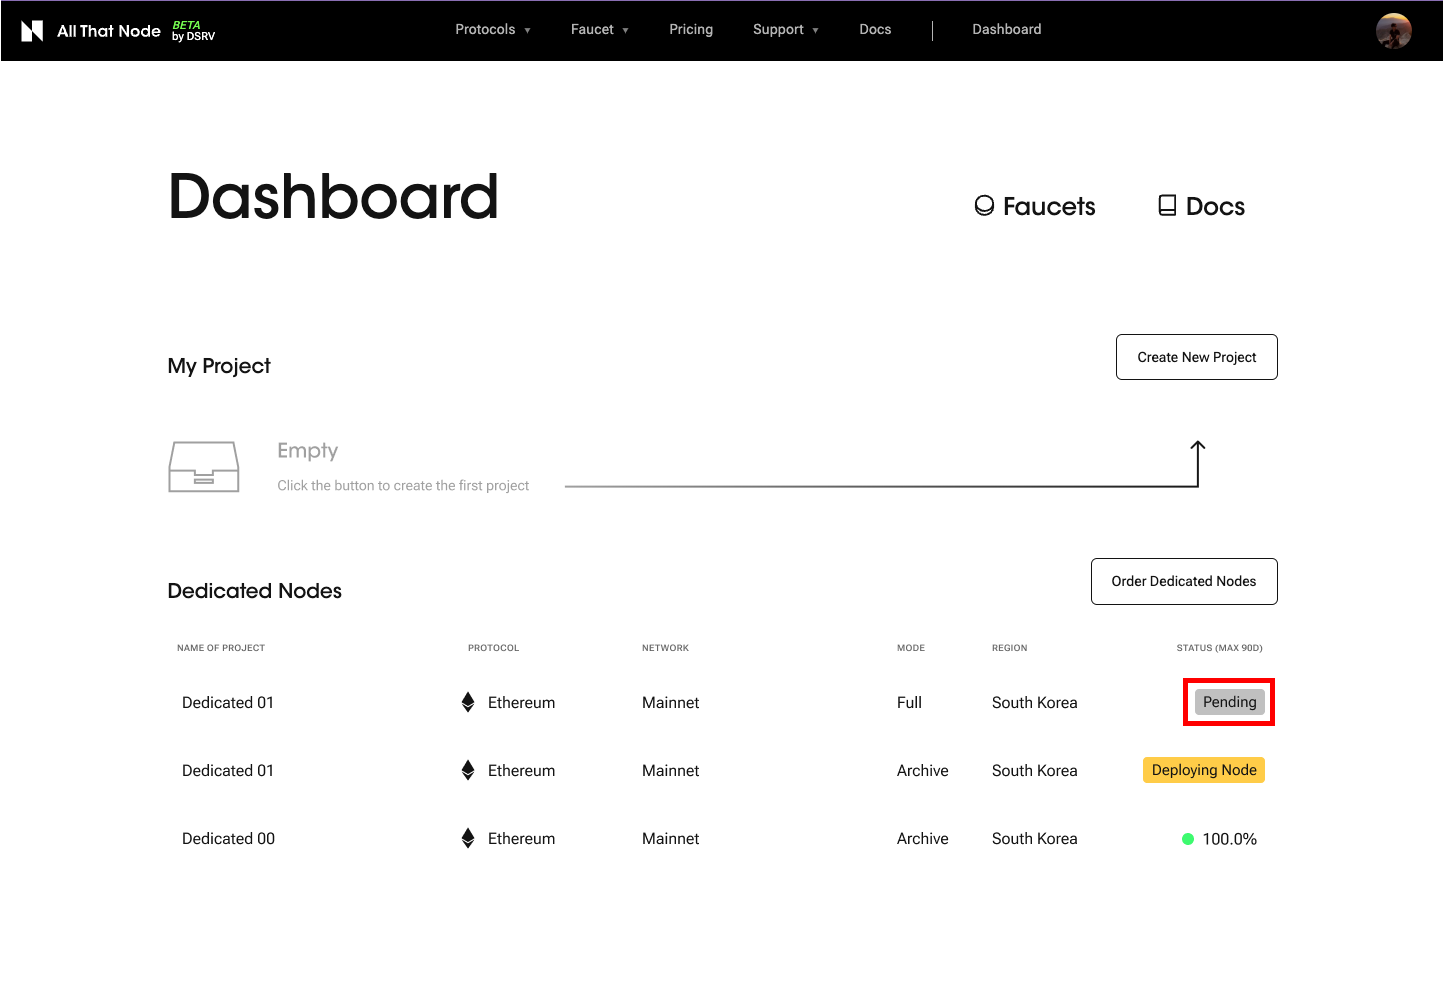
- Once the payment is completed, we'll proceed to the node setup. While reviewing your dedicated node request, your node status will appear as "Pending" on the dashboard.
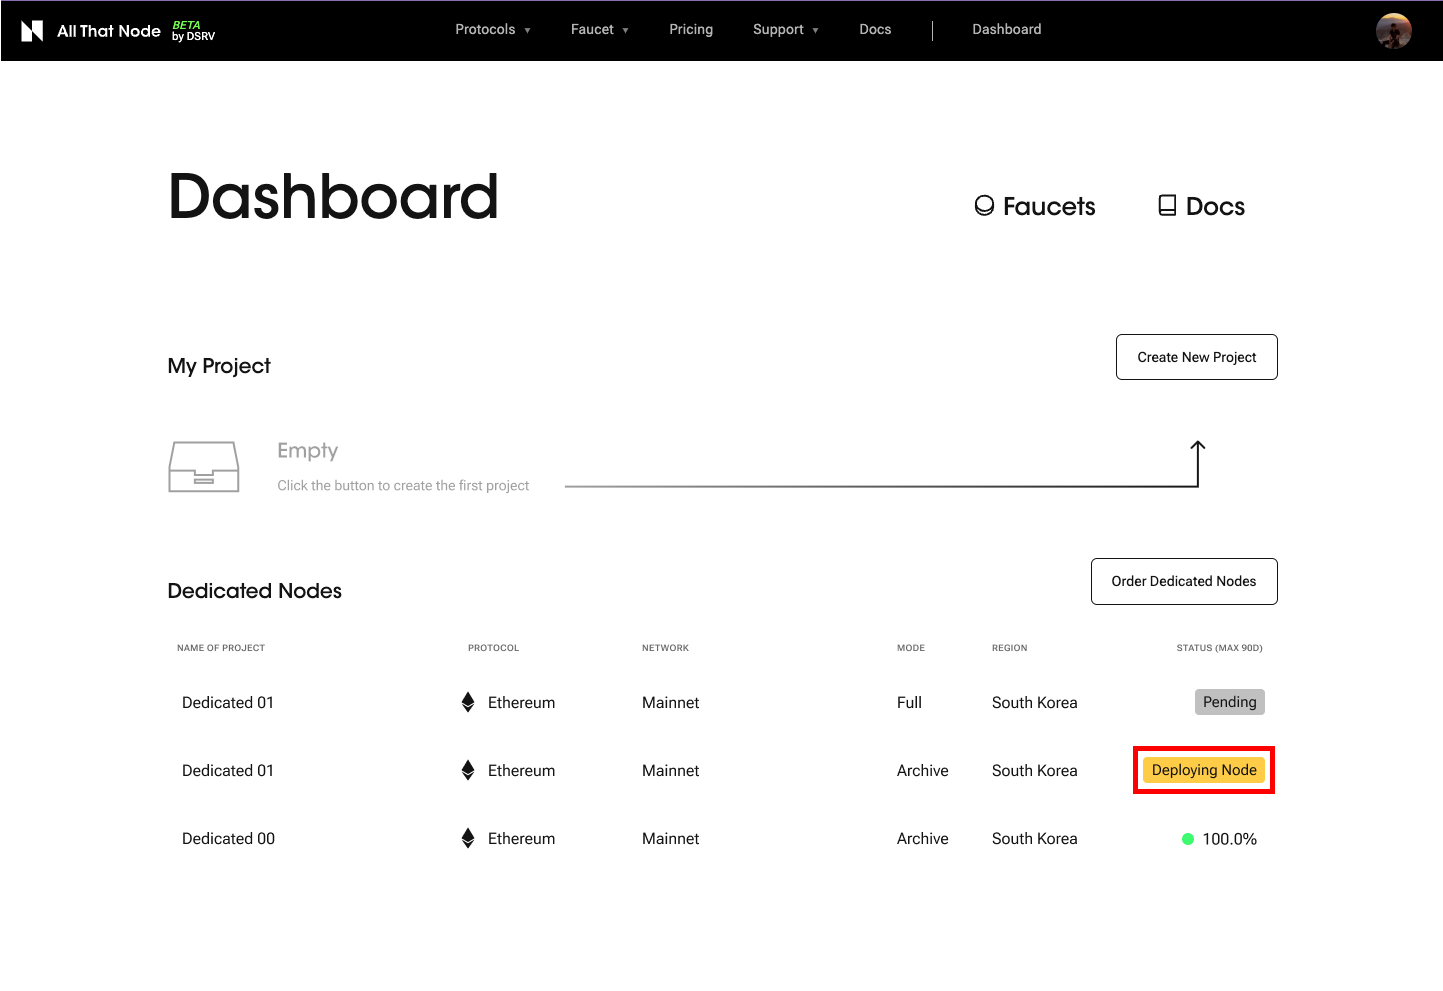
- After the node request is accepted, and while we setup the node, your node status will be shown as "Deploying Node".
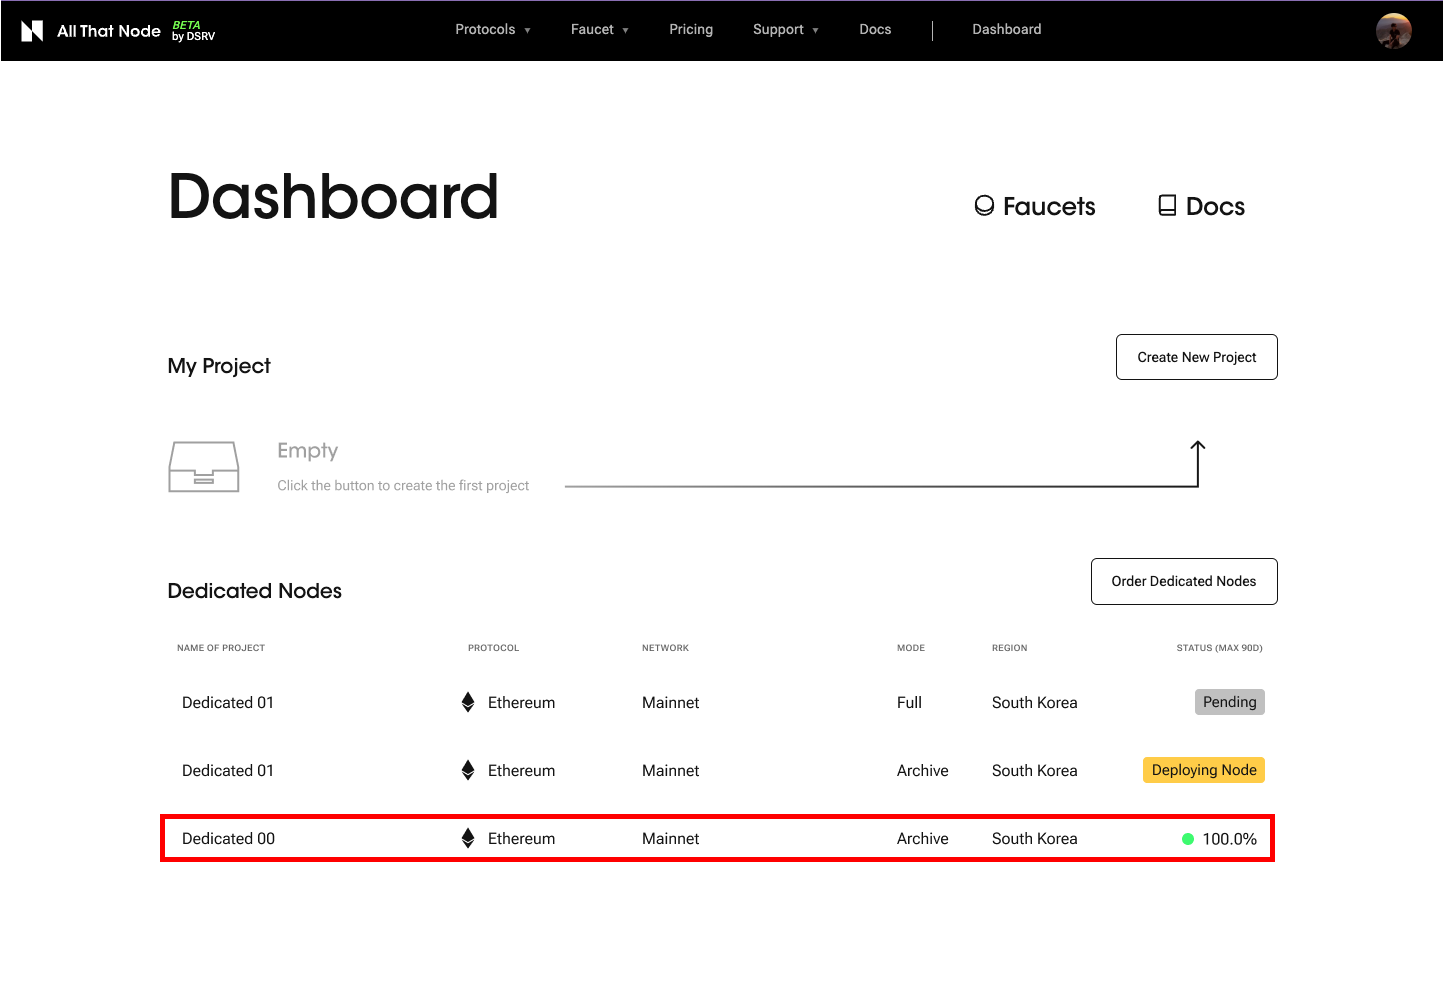
- Upon completion of the setup, we'll send an email to notify you. You'll be able to see your dedicated node on your dashboard with the node uptime.
Please be aware that the setup time for a dedicated node may vary, taking several days depending on the specific protocol and network.
3. Try Your First Requests Through the Endpoints.
- Now you can send requests through the endpoints. Choose the provider type you're going to send a request through.
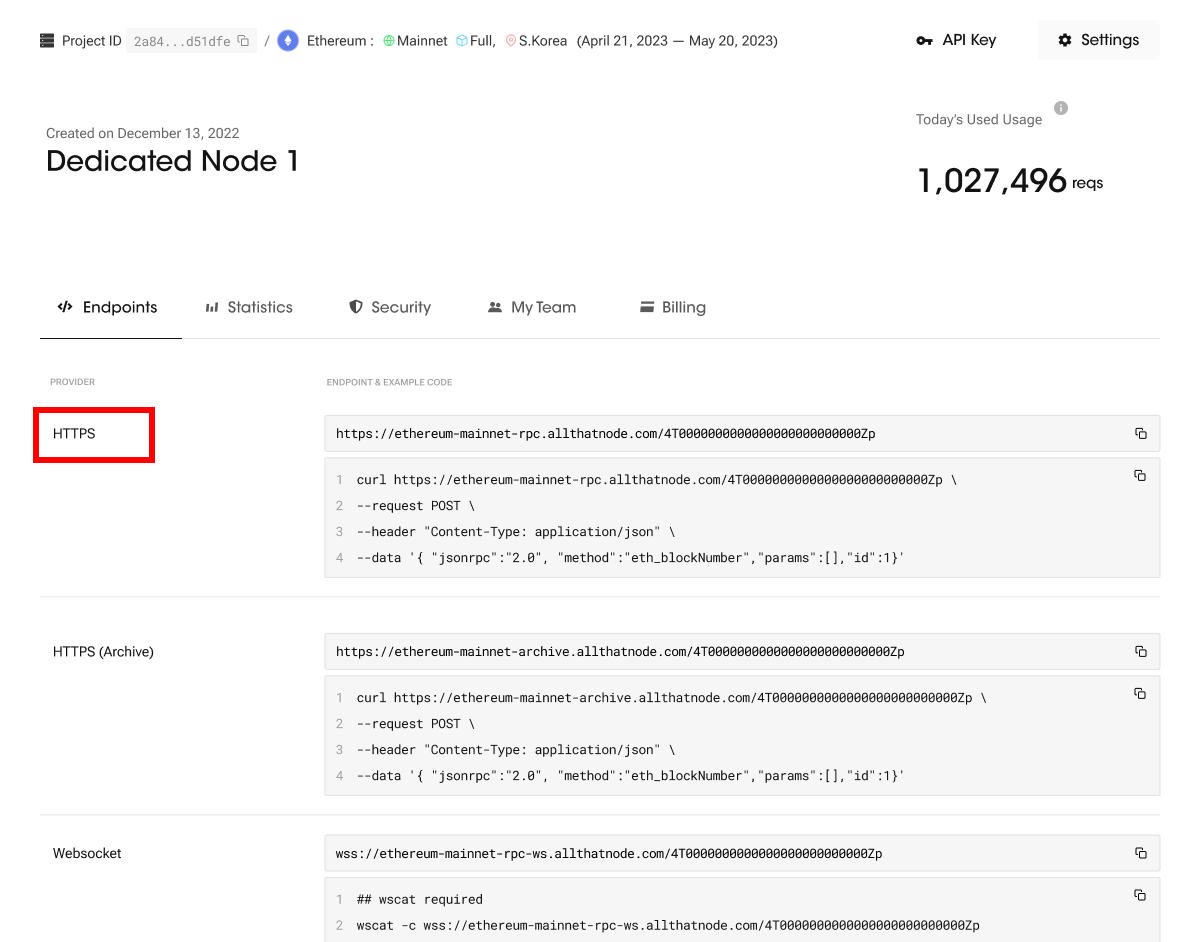
- Click the code example area. The example will be copied to your clipboard.
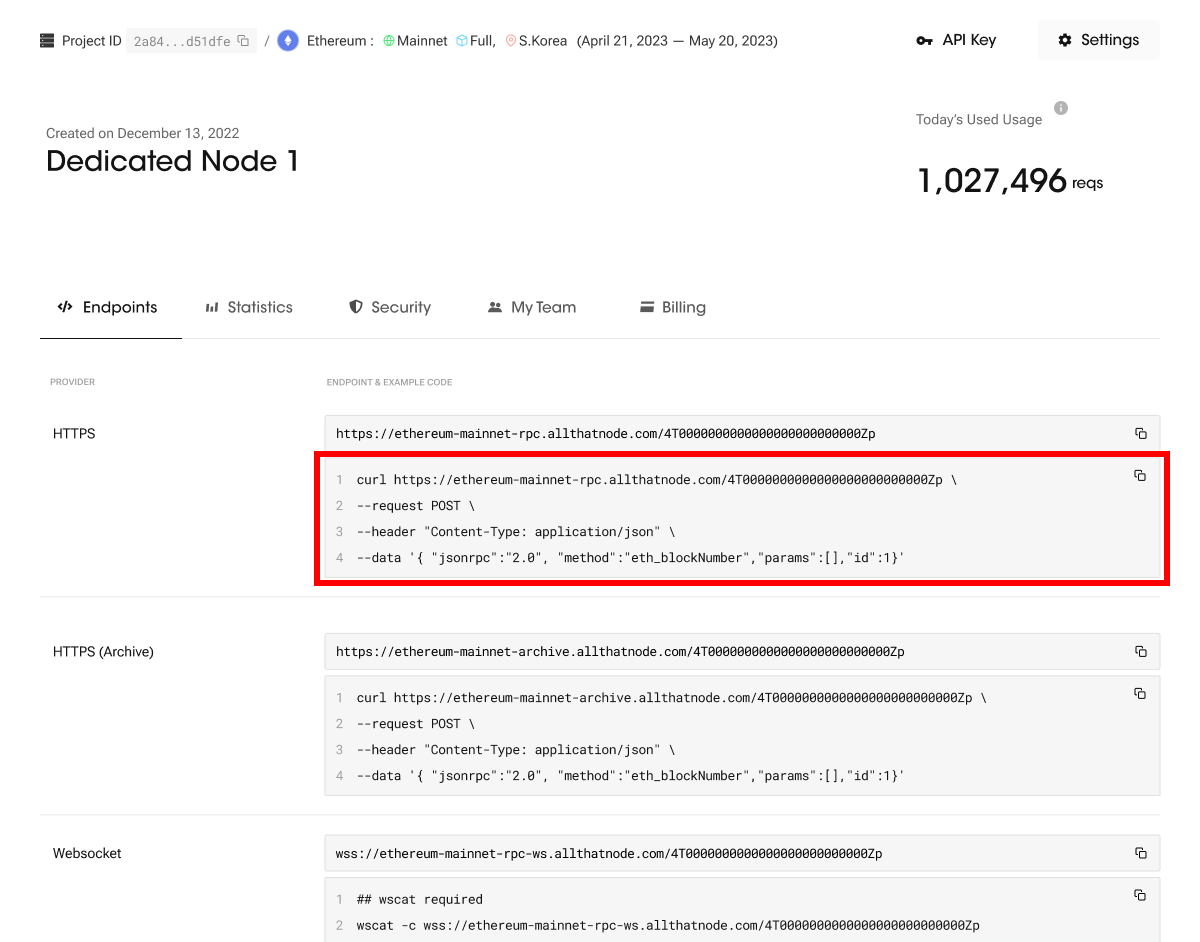
- Paste the code to the prompt and send. And then check the return value.
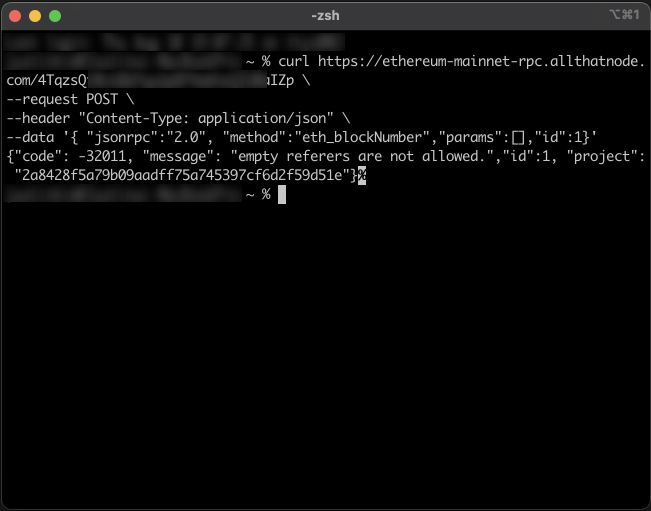
Any errors?Go check out the "Error Messages" page to figure out the reason.
Updated about 1 year ago
Did this page help you?