By Referer
Let's learn how to set the allowlist or blocklist with referer!
What is a Referer?
The "referer" (or "referrer") is a header field that indicates the URL of the webpage or resource from which the current request originated. It provides information about the referring source, allowing servers to track the source of traffic or to implement certain security measures based on the referring source. <an excerpt fromWikipedia>
Why do we need a referer allowlist / blocklist?
You can prevent unauthorized or malicious requests, as well as define which websites or applications can legitimately access your resources. It helps ensure that your services are used only by authorized parties, maintaining the integrity of your system.
By configuring an allowlist, you specify a list of trusted domains or URLs that are allowed to make requests to your application or resource. Any requests coming from URLs outside the allowlist will be rejected.
It's important to note that the HTTP referer header can be manipulated or omitted by certain clients or proxies, so it should not be solely relied upon for security. Implementing additional security measures, such as Json Web Token(JWT), is crucial for comprehensive protection.
How to setup the referer allowlist / blocklist?
Available Limitation: You can add up to 25 domains for one project.
Allowlist
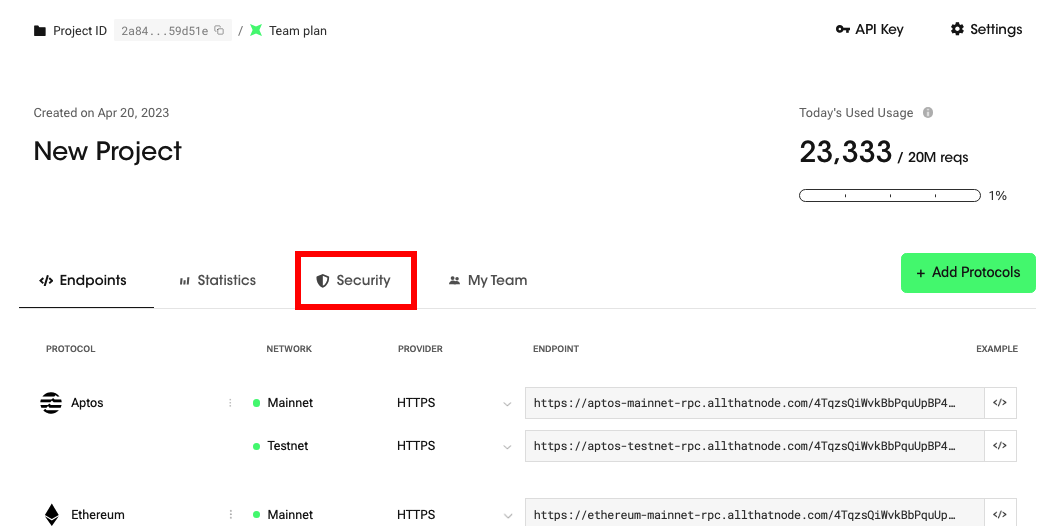
- Go to the "Security" menu on your dashboard.

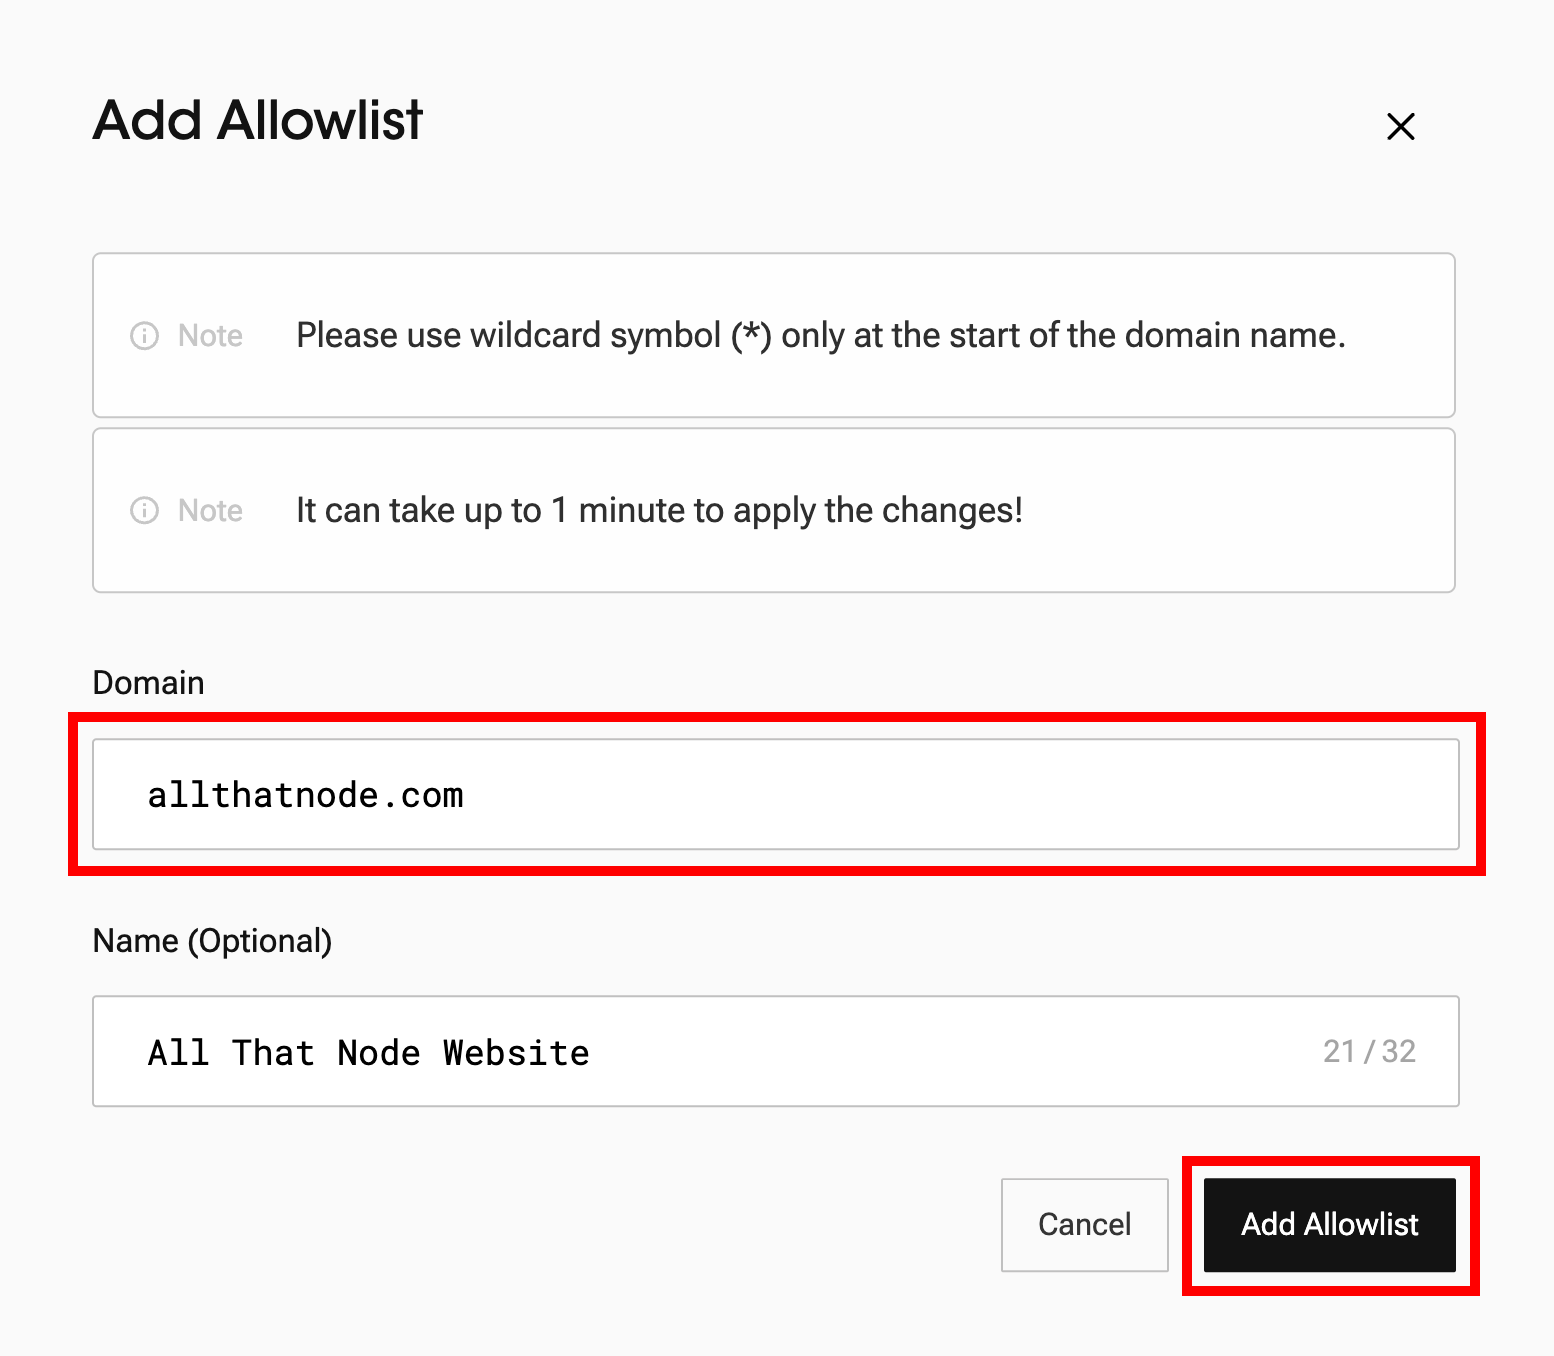
- Click "Add Allowlist." (or "Add Blocklist")

Tip: The allowlist and blocklist are mutually exclusive. If one is activated, the other is deactivated. You can choose which one to activate by clicking the toggle button.
- Enter a domain (URL) to allow and click "Add Allowlist." (Name is optional.)

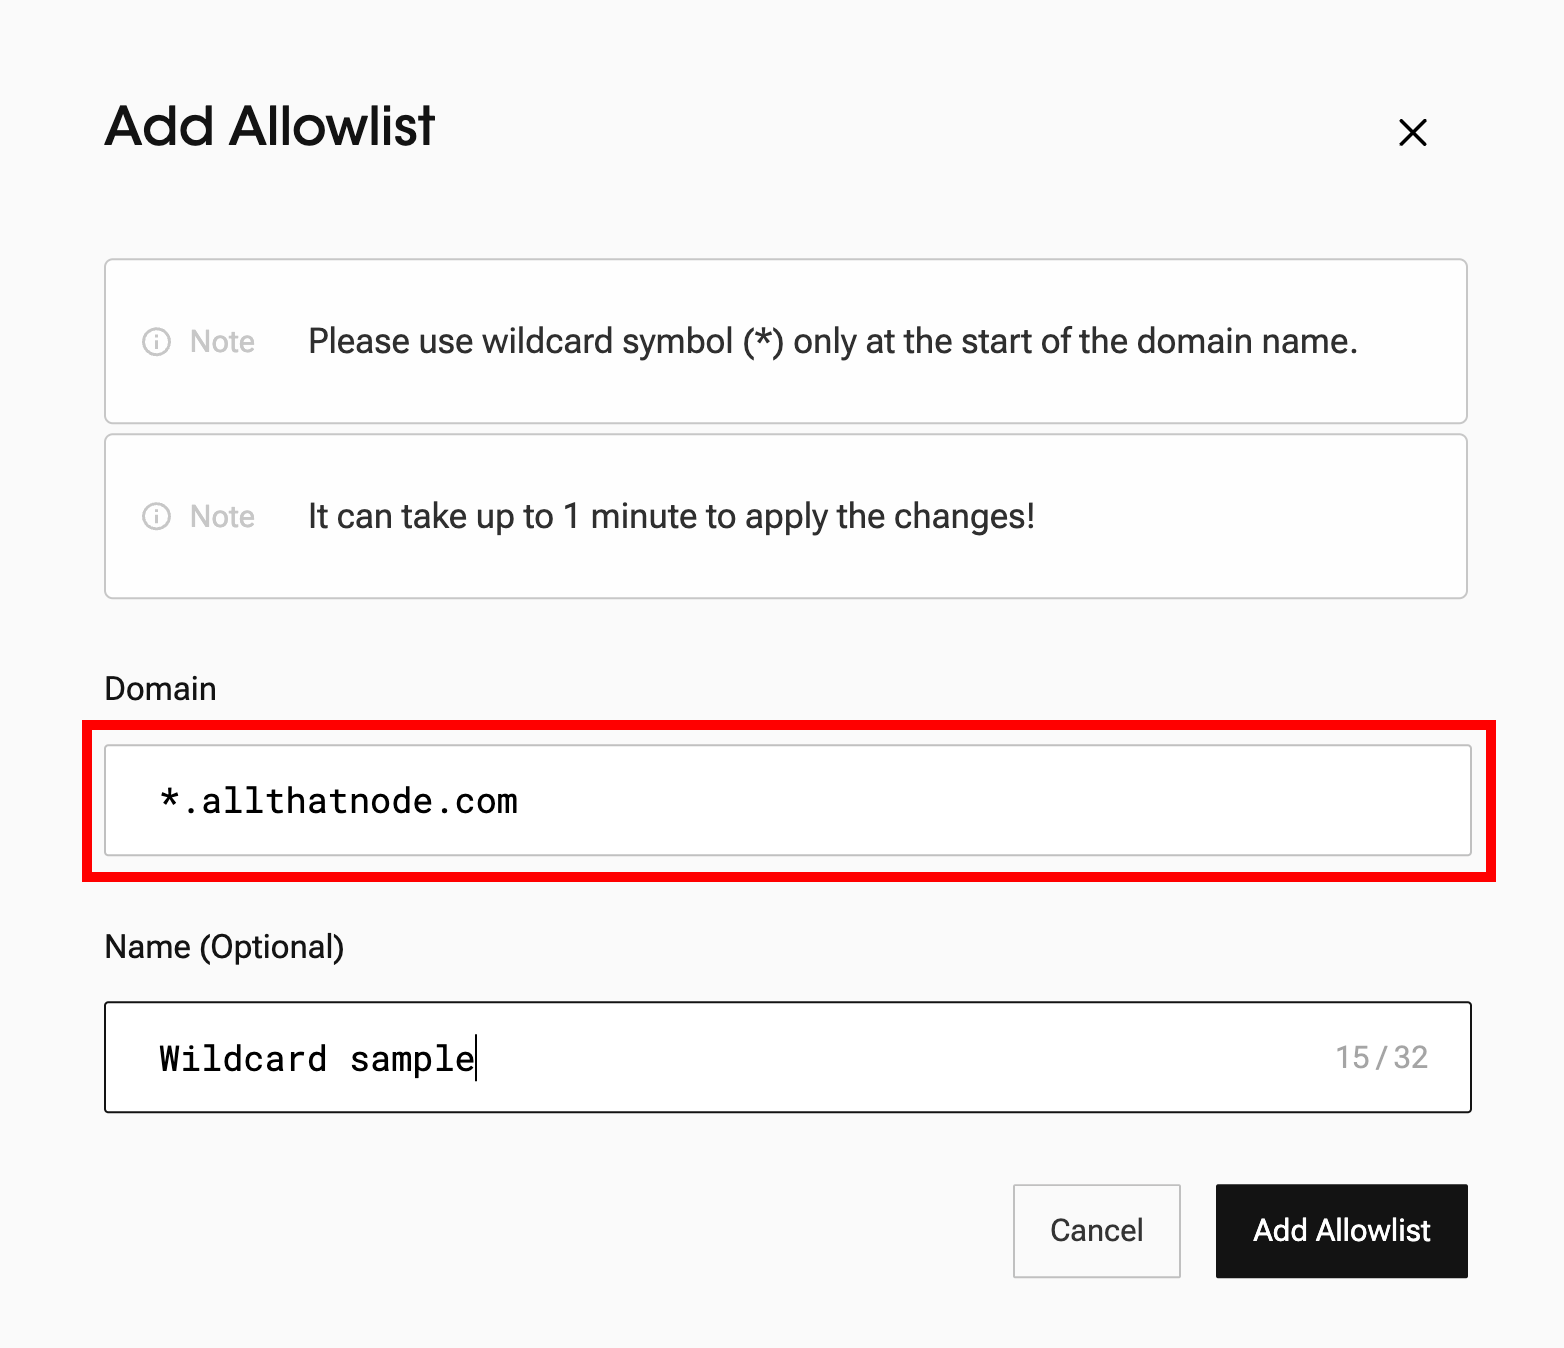
- You can also use wildcard at the start of the domain name.

- Once you register the domain, you can check that the referer has added it to the allowlist.

- Now, requests from a referer that is not registered in the allowlist will be rejected.
Blocklist
- If you want to change the list type from an allowlist to a blocklist, click the toggle button and check the activation message. Now, any request that includes a referer registered in the blocklist within the request header will be rejected.

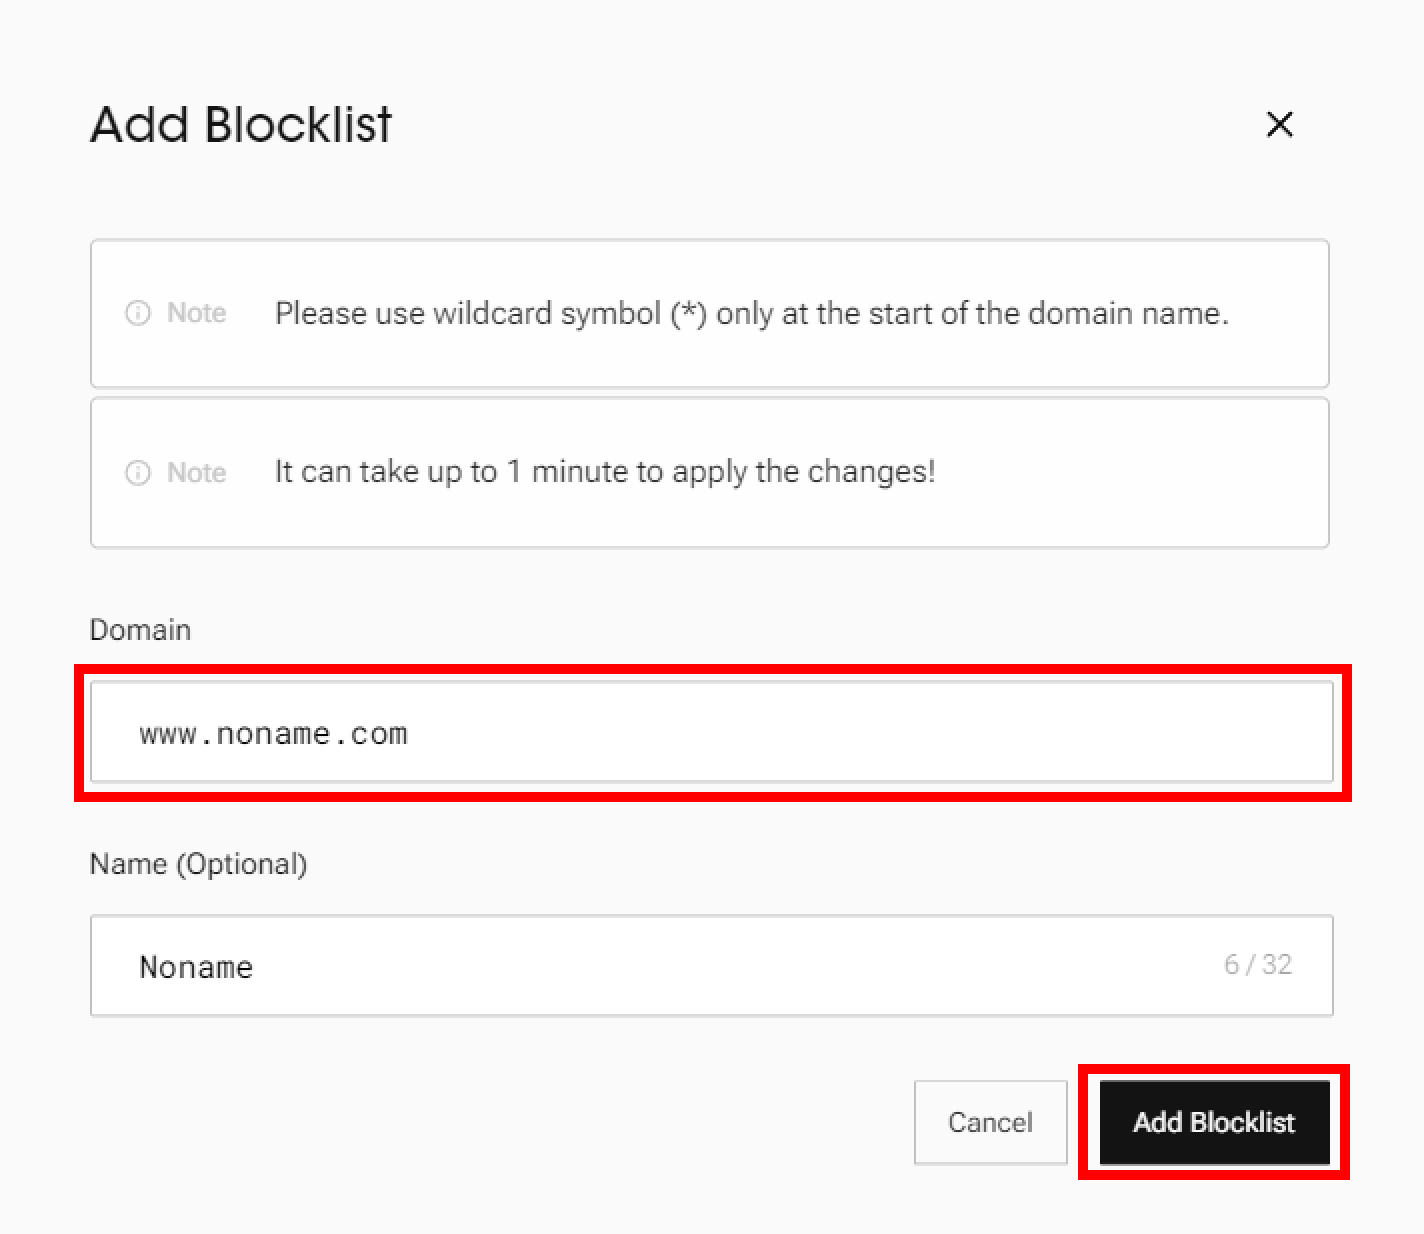
- Click "Add Blocklist" to block a referer.

- Enter a domain (URL) to block and click "Add Blocklist." (Name is optional.)

- The referer has been successfully added to the blocklist.

- If the request header contains a referrer that is included in the blocklist, you will receive an error response, as shown below.
Error References
You might encounter following errors when you enable referer allowlist/ blocklist settings.
-
The request has a "referer" header, and it is blocked due to the referer allowlist/ blocklist.
//Error Response example {"code": -32011, "message": "referer allthatnode.com is not allowed.", "project" : "2a8428f5a79b09aadff75a745397cf6d2f59d51e"} -
There is a referer allowlist configured in the dashboard, but the request does not include a "referer" header.
//Error Response example
{"code": -32011, "message": "empty referers are not allowed.", "project" : "2a8428f5a79b09aadff75a745397cf6d2f59d51e"}
Updated 8 months ago